Drawing Tools
Add paths and annotations to the photo.
This screen is available from Photo View Edit Drawings button.
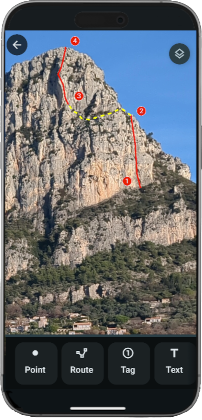
Add paths and annotations to the photo to describe a route or to detail locations, you can also view your GPX tracks on the photo.
- Add drawings and annotations on photo
- Add detailed descriptions with information bubbles
Tools
Point, path, area, text...: use the various drawing tools to quickly add annotations.
The tag tool allows you to embed detailed descriptions in information bubbles.
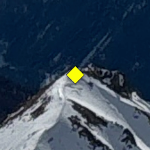
Point

Example of point:
Point style options:
- Point type: star, square, cross, diagonal cross, rhombus, triangle, dot
- Size
- Color
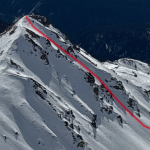
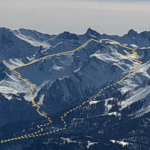
Route

Example of route:
Route style options:
- Line style
- Width
- Color
- Opacity
Tag

The tag tool allows you to embed detailed descriptions in information bubbles.
Tag style options:
- Tag text: tag text, made to be short (one or few characters)
- Size: tag size
- Color: tag background color
- Description: text to be displayed in an information bubble when clicking on the tag.
Example of tag with information bubble:

Description text support the following html tags:
<b>bold</b>: bold text<i>italic</i>: italic text<u>underlined</u>: underlined text<p>paragraph</>: paragraph<br>and<br/>: line break<a href="https://pixmap-studio.com/veezer/">Veezer</a>: hyperlink
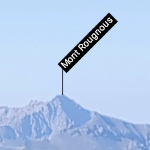
Text

Example of text:

Text style options:
- Text: text line, support line break
- Size
- Bold: switch
- Background mode: switch
- Color
- Alighnment: select how the text is aligned on the anchor point
- Rotation: rotation angle
Annotation

Example of annotation:
Style options:
- Text: text line, support line break
- Annotation type :

- Size: font size
- Background mode: switch
- Color: text color
- Distance: anchor line length
Zone*

Example of zone:
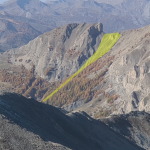
Zone style options:
- Color: surface color
- Opacity: surface opacity
Symbol*

Example of symbol:
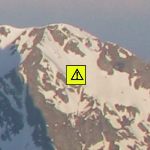
Symbol style options:
- Symbol: warning, danger, flag, information, star
- Size: symbol size
- Color: symbol color
Arrow*

Example of arrow:
![]()
Arrow style options:
- Arrow: arrow shape
- Size: arrow size
- Color: arrow color
- Alignment: arrow alignment regarding insertion point
- Rotation: rotation angle
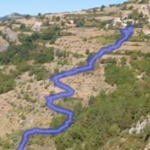
GPX*

Select a GPX file of a track or point of intereset.
The GPX must contain 3D coordinate (altitude must be defined in the GPX).
Once imported the feature reacts like a point or a route according to the geometry.
Example of GPX import:
If you need to hide the track locally, cut the track to separate hidden parts and edit style separately or remove. See Node Edition Cut object.
(*) Veezer Pass subscription
Object Creation
Simple Object
Point, Tag, Text, etc.:
- Select tool to start object creation,
- Zoom and pan to set the insertion point in the cross hair,
- Select style options,
- Validate (or double tap)
Composed Object
Route and Zone: For each point, set the insertion point then validate point (or double tap).
During creation, the last created point can be discarded with Discard button.
Validate or double tap to complete the object.
Set Cartographic Position
When defining a point position with the cross hair, you can instead enter a cartographic position with Define position button.
The corresponding position on the photo will be set according to the current photo positioning settings.
Object Edition
Click on an object to edit ot delete it.
Available actions:
- Edit Style: edit the object representation.
- Duplicate: duplicate the selected object.
- Delete: remove the selected object.
Node Edition
When an object is selected, click again the object to enter in node edition.
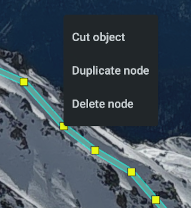
Node edition allows you to move each node individually (the whole object if it's based on a unique point).
For objects with several nodes, long press a node to access more options:
- Cut object (route): split the linestring in two parts.
- Duplicate node (route and zone): insert a node copy.
- Delete node: remove node.
Multiselection
Long press an object to enter mutliselection mode. Press other objects to add them to the selection.
Available actions:
- Delete: remove the selected objects.
- Select all: add all objects to the selection.