Take a Control Point on the Ground
Learn how to create control points from your own position during your journey.
Work in progress
We'll see here very soon a real example of control point creation on the field, in a typical Veezer usage.
For now, let's review the recommendations from the quick start guide:
Improve location with a control point
For optimal accuracy, it is recommended to add one control point per photo.
A control point allows you to improve or verify the location by pointing a reference position on the photo.
A single control point allows for 4 to 6 times more accurate positioning.
Add a control point when you arrive at a location that is easily identifiable in the photo, more than 300 m away (1000 ft).
Identify a reference position
Use your own position as a reference during your journey. You can also directly specify the map coordinates of a position.
Choose a place that is easily identifiable in the photo (rock, tree, summit, pass, building, etc.).
The control point must be at least 300 m (1000 ft) from the photo to obtain good accuracy.
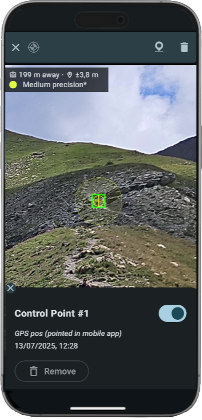
Example of control point:
The greater the distance, the more accurate the control point will be.
Create a control point
Zoom in on the image to locate your position then tap Create Control Point button (or long-press the photo).
Point the position precisely on the photo.
Check that the GPS accuracy is sufficient.
A bad control point can completely distort the location on the photo.
Validate to create the control point. The location on the photo is immediately updated.